Your plastic kayak has seen better days. Sun-faded colors, scratches across the hull, and perhaps a crack or two from that rocky encounter last season. Before relegating it to the garage corner or listing it for pennies online, consider restoration. With the right materials and methods, you can breathe new life into your polyethylene vessel and extend its paddling years considerably.
Plastic kayak restoration isn’t just about aesthetics—it’s about maintaining structural integrity, ensuring safety on the water, and maximizing your investment in outdoor recreation equipment.
Understanding Plastic Kayak Construction
Most recreational kayaks are manufactured from rotomolded polyethylene, a durable thermoplastic that withstands impacts but degrades under UV exposure. High-density polyethylene (HDPE) and linear low-density polyethylene (LLDPE) represent the most common materials in kayak manufacturing.
Understanding your kayak’s composition determines which restoration approaches work best. Polyethylene kayaks differ fundamentally from fiberglass or composite models, requiring specialized repair techniques and materials that bond effectively with plastic surfaces.
Over time, UV radiation breaks down the polymer chains in polyethylene, causing oxidation that manifests as fading, chalking, and surface brittleness. Mechanical damage from impacts, abrasion, and improper storage compounds these issues. Restoration addresses both cosmetic deterioration and structural compromise.
Assessing Your Kayak’s Condition
Begin with a thorough inspection. Check the hull for cracks, gouges, and punctures. Run your hands along seams and stress points where the kayak flexes during use. Look for oil-canning—flat areas that pop in and out when pressed, indicating material fatigue.
Examine the deck for sun damage. Severely oxidized polyethylene appears chalky and feels rough. Test flexibility by applying gentle pressure to thinner sections. Brittle plastic that doesn’t flex properly may indicate advanced degradation requiring professional assessment.
Inspect hardware including seat mounts, foot pegs, bungee cords, and hatch covers. Often, replacing worn accessories dramatically improves functionality without extensive hull work.
Document damage with photographs. This creates a restoration roadmap and helps when sourcing materials or consulting with professionals about repair strategies.
Essential Materials for Kayak Restoration
Cleaning Supplies: Marine-grade soap, soft brushes, and microfiber cloths remove dirt and oxidation. Avoid harsh solvents that damage polyethylene surfaces.
Sanding Materials: Progressive grits from 80 to 400 prepare surfaces for repair. Wet sanding reduces dust and prevents heat buildup that can warp plastic.
Repair Compounds: Polyethylene welding rods, marine-grade epoxy designed for plastics, and specialized plastic repair kits address structural damage. Standard epoxies often fail on polyethylene due to poor adhesion.
Restoration Products: UV protectants, plastic restorers, and marine polish rejuvenate faded surfaces. Quality products contain UV inhibitors that slow future degradation.
Specialized Equipment: Heat guns for plastic welding, plastic welding tools, and proper ventilation equipment for safe application of repair materials.
For Australian kayak enthusiasts, sourcing quality plastic restoration materials locally ensures project success. Associated Plastics offers comprehensive solutions for plastic repair and restoration projects, providing materials specifically engineered for polyethylene applications. Their expertise in plastic materials makes them an invaluable resource when selecting appropriate compounds for kayak restoration work.
Step-by-Step Restoration Methods
Surface Cleaning and Preparation: Wash the kayak thoroughly with marine soap and water. Remove all dirt, salt residue, and organic growth. Allow complete drying—moisture trapped under repair materials causes adhesion failure.
Addressing Surface Oxidation: For mild oxidation, marine polish and UV protectant restore appearance. Moderate oxidation requires wet sanding with 220-grit sandpaper, followed by progressively finer grits up to 400. Severe oxidation may need professional assessment to determine if the material retains sufficient integrity.
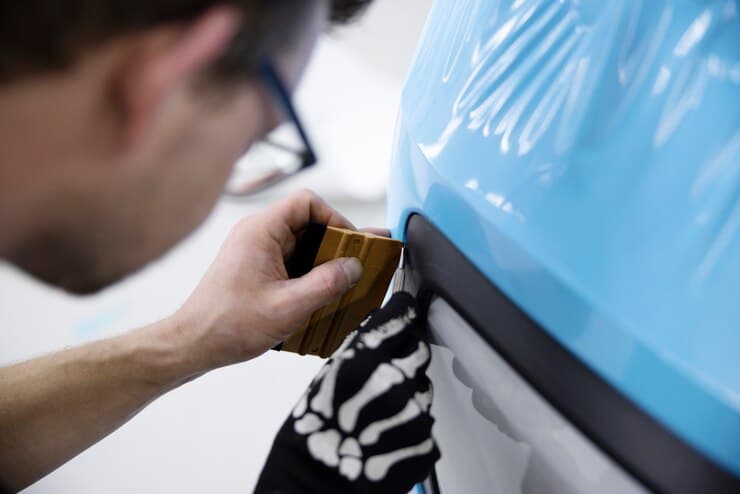
Crack and Puncture Repair: Small cracks respond well to plastic welding using compatible polyethylene welding rods and proper heat application. This fuses new material directly to the existing plastic, creating strong, permanent bonds.
Larger damage requires reinforcement. Clean the damaged area thoroughly, sand to create texture for adhesion, then apply marine-grade plastic repair compounds. Some professionals use plastic welding mesh embedded in melted polyethylene for additional strength.
Color Restoration: After structural repairs, restore color using marine-grade paint designed for polyethylene or specialized plastic restoration products. Proper surface preparation determines coating longevity. Light sanding creates texture that helps coatings adhere to the slick polyethylene surface.
Hardware Replacement: Install new bungee cords, replace worn pad eyes, upgrade seat cushions, and refresh hatch seals. These updates significantly improve functionality and comfort.
Professional vs. DIY Restoration
Simple cleaning, polishing, and minor scratch repair suit DIY approaches. YouTube tutorials and online forums provide guidance for basic restoration techniques. Material costs remain modest—$50 to $150 for cleaning supplies, polish, and minor repair compounds.
Complex structural repairs warrant professional expertise. Certified kayak repair specialists possess equipment and experience for proper plastic welding, ensuring repairs maintain hull integrity. Professional services prevent costly mistakes that compromise safety.
Consider professional help for cracks near stress points, extensive sun damage, or repairs involving the kayak’s structural ribs. Professional restoration costs typically range from $200 to $600 depending on damage severity.
Cost Breakdown for Kayak Restoration
Basic DIY Restoration: $50-$150 covering cleaning supplies, UV protectant, marine polish, and minor repair materials.
Intermediate DIY Restoration: $150-$300 including sanding materials, plastic repair compounds, painting supplies, and hardware replacements.
Professional Crack Repair: $100-$300 per repair depending on location and severity.
Complete Professional Restoration: $400-$800+ for extensive work including multiple repairs, full color restoration, and hardware upgrades.
Replacement Hardware and Accessories: $50-$200 for seats, foot pegs, bungees, and hatch components.
Compare restoration costs against replacement expenses. Quality kayaks cost $500-$1,500 new. If restoration runs under 40% of replacement cost and the kayak’s remaining lifespan justifies investment, restoration makes financial sense.
Sourcing Quality Materials in Australia
Finding appropriate materials determines restoration success. Generic plastic adhesives and automotive products rarely work effectively on polyethylene kayaks. Marine-specific products engineered for plastic boat repair provide superior results.
Associated Plastics offers specialized materials ideal for kayak restoration projects. Their product range includes polyethylene sheets, repair compounds, and specialty plastics suitable for marine applications. With locations across Australia, they provide both materials and expert guidance for plastic restoration projects.
Visit associatedplastics.com.au to explore their comprehensive inventory of plastic materials and restoration solutions. Their knowledgeable staff can recommend appropriate products based on your specific kayak repair needs, ensuring you select materials that bond properly with polyethylene and withstand marine environments.
Maintenance After Restoration
Protect your restoration investment through proper maintenance. Store kayaks indoors or under UV-protective covers. Avoid leaving kayaks on hot surfaces like asphalt where heat accelerates degradation.
Rinse with fresh water after saltwater use. Apply UV protectant every few months, increasing frequency for kayaks stored outdoors. Inspect regularly for new damage requiring prompt attention before small issues become major problems.
Transport kayaks properly using padded cradles that distribute weight evenly. Avoid over-tightening tie-down straps that create stress points in the hull.
Is Restoration Worth It?
Restoration makes sense when structural integrity remains sound despite cosmetic issues. A well-maintained kayak with sun fading but no cracks merits restoration. Similarly, a newer kayak with isolated damage from a single incident justifies repair.
Skip restoration for kayaks with extensive brittle areas, multiple structural cracks, or severe oil-canning. These conditions indicate material failure beyond cost-effective repair.
Ready to restore your plastic kayak? Start by assessing damage honestly, researching appropriate techniques, and sourcing quality materials. For professional-grade plastic restoration materials, contact Associated Plastics at associatedplastics.com.au. Their expertise in plastic materials and marine applications makes them the ideal partner for your kayak restoration project.
Don’t let a faded, scratched kayak keep you off the water. With proper materials, methods, and guidance from plastic specialists like Associated Plastics, you can restore your vessel to reliable, attractive condition—ready for many more seasons of paddling adventures.