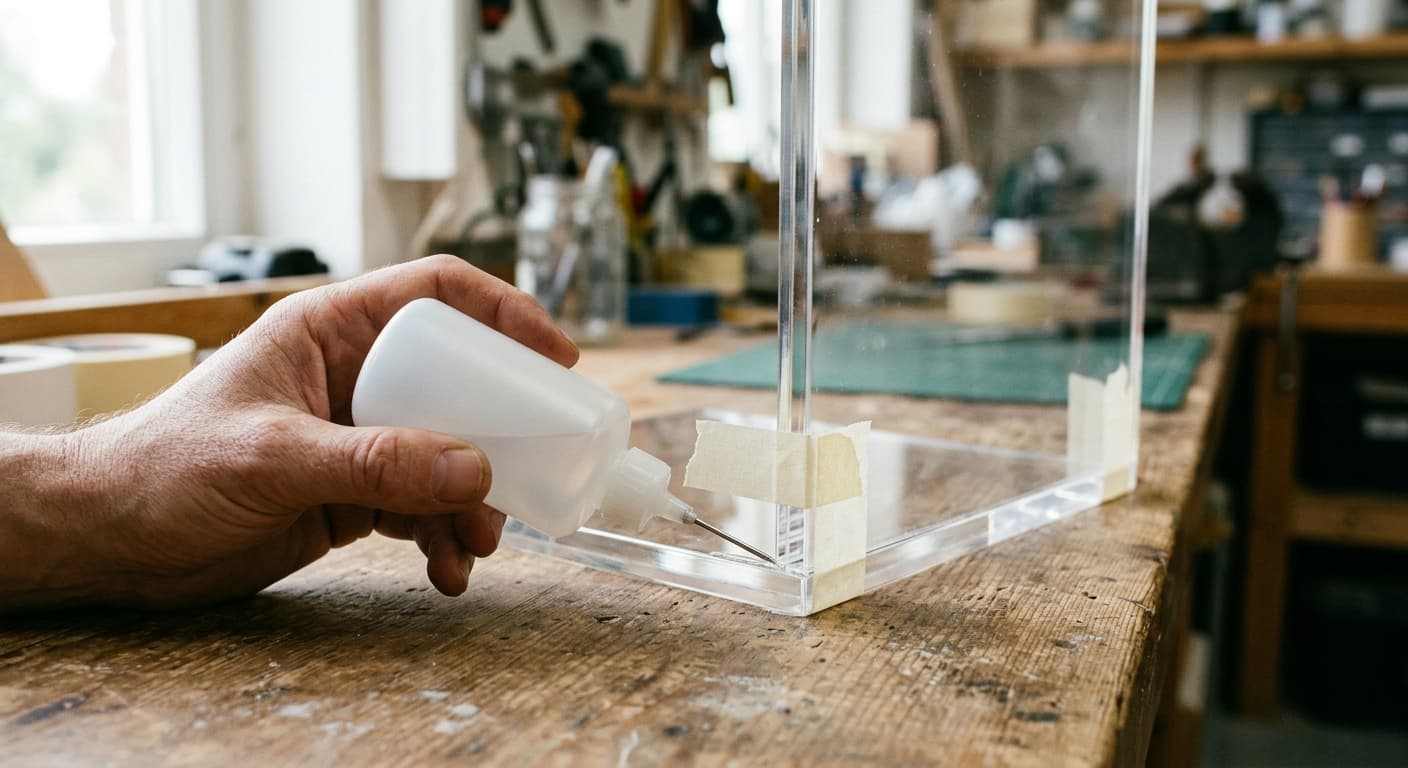
The short answer: use Weld-On 3 when your two acrylic edges mate cleanly, and Weld-On 16 when they do not. Weld-On 3 is a water-thin capillary cement that you run into an already-closed joint with a needle applicator. Weld-On 16 is a thickened, syrup-like cement in a tube that fills gaps, holds on vertical joins and leaves a visible fillet.
Both are solvent cements, not glues. They do not sit between the parts as a separate layer. They dissolve the surface of both faces so the acrylic flows together and cures as one piece, which is why a properly made joint is as strong as the sheet either side of it. It is also why the same product will do absolutely nothing on polyethylene or polypropylene.
Here is how to pick between them and how to get a joint that does not craze, bubble or fail six months later.
How solvent cement actually works
Conventional adhesives grip two surfaces mechanically or chemically while remaining a distinct third material in the sandwich. Solvent cement does something different. The solvent attacks the polymer chains at the surface of the acrylic, softening a thin layer on each face. When the two softened faces are held together, the chains intermingle. As the solvent evaporates the acrylic re-hardens, and the boundary between the two parts effectively stops existing.
Three consequences follow from that, and they explain most of what goes wrong for people new to acrylic:
- Fit matters more than the cement. Solvent cement cannot bridge a gap it cannot reach. A joint that is 0.3 mm out will be weak no matter which product you use.
- Pressure is the enemy. Clamping hard squeezes the softened acrylic out of the joint and starves it. Light contact is all you want.
- It only works on solvent-susceptible plastics. Acrylic, PVC, styrene and ABS all respond. The polyolefins do not.
Weld-On 3: the default for clean joins
Weld-On 3 is water-thin, low viscosity and fast. Applied from a needle applicator along a closed seam, capillary action draws it right through the joint in seconds. It grabs in well under a minute, reaches handling strength in a few minutes and continues to build over the following day.
Use it for display cases, boxes, brochure holders, small enclosures and anything where the edges are saw-cut or machined square and the run is short enough to complete before the solvent starts flashing off. It is the cement most acrylic fabricators reach for first, and it is what we use in our own workshop for the majority of assembled acrylic work.
Its weakness is the flip side of its strength. On a one-metre seam, Weld-On 3 will be setting at the start of the run before you finish the end of it, which leaves an inconsistent joint. For long seams or larger assemblies, plan the run in shorter sections, or move to Weld-On 16 if the joint will not close up cleanly regardless.
Weld-On 16: for gaps, angles and repairs
Weld-On 16 is a different animal. It is medium-bodied, roughly the consistency of honey, and comes in a tube rather than a can. It does not run, which is the entire point.
Reach for it when:
- The edges are not perfectly mated. Hand-cut or slightly out-of-square edges leave gaps that capillary cement cannot fill. Weld-On 16 bridges them.
- The joint is vertical or overhead. Water-thin cement runs straight out of an overhead seam. Number 16 stays put.
- You want a visible fillet, either for strength on a load-bearing corner or because the design calls for it.
- You are doing a repair on an existing piece where you cannot dry-fit and clamp the way you would on a new build.
- You are bonding acrylic to a dissimilar rigid plastic where the surfaces will not close up tightly.
Weld-On 16 sets in around five to six minutes and reaches roughly 80 per cent of its ultimate strength at about 16 hours. It is not a substitute for a good capillary joint on optically clear work: because it cures as a body of material rather than fusing an invisible line, the joint shows. On a clear display case a 16 joint will read as a bead. On a machine guard bracket nobody will care.
Quick comparison
| Weld-On 3 | Weld-On 16 | |
|---|---|---|
| Viscosity | Water-thin | Medium-bodied, syrupy |
| Container | Can, decanted to applicator | Tube |
| Method | Capillary | Applied to the joint face |
| Gap filling | No | Yes |
| Working time | Shortest | Around 5 to 6 minutes |
| Joint appearance | Near invisible | Visible fillet |
| Best for | Boxes, cases, short clean seams | Gaps, vertical joins, repairs |
How to glue acrylic properly
Most failed acrylic joints are preparation failures, not product failures. The sequence below is what we follow on production work.
1. Prepare the edges
Both mating faces need to be square, clean and dry. Saw-cut or machined edges bond best. Do not flame polish an edge you intend to cement. Flame polishing leaves internal stress in the surface, and stressed acrylic exposed to solvent crazes into a network of fine cracks. Polish the show edges after assembly, not the joint faces before it.
Remove the protective film only from the immediate joint area. Leaving the rest on protects the sheet from drips.
2. Dry fit and hold
Assemble the parts without cement and check the fit under light. Any daylight through the seam means capillary cement is the wrong choice and you should move to Weld-On 16. Hold the parts with tape, a light spring clamp or a simple jig. The pressure should be just enough to keep the faces touching.
3. Run the cement
Fill a needle applicator bottle, squeeze gently to purge air, and lay the needle in the corner of the seam. Move steadily along the joint and let capillary action pull the cement through. You should see the joint line go clear as it fills. Do not go back over a section you have already done.
4. Leave it alone
Do not move the part for several minutes. Handle lightly after ten or fifteen minutes. Leave it a couple of hours before assembling anything else onto it, and 24 to 48 hours before putting the joint under real load. Water-holding assemblies such as tanks want the full 48 hours minimum.
5. Finish
Any squeeze-out is cured acrylic and needs to be cut or sanded off, not wiped. Polish exposed edges afterwards. Never clean finished acrylic with ammonia-based glass cleaner or an aggressive solvent, both of which will craze the surface.
You can order Weld-On 3 and 16 along with needle applicators and acrylic polish from our adhesives and polish range.
What Weld-On will and will not bond
This is where most of the wasted money goes. Solvent cement is chemistry, not adhesion, so the material either responds or it does not.
Bonds well: acrylic to acrylic (the intended use, and the strongest result), PVC, foamed PVC, high impact polystyrene and ABS. Acrylic to any of those dissimilar rigid plastics will bond, though not as strongly as acrylic to itself.
Bonds poorly: polycarbonate. The solvent softens it but the two faces do not fuse the way acrylic does. Polycarbonate joins are usually better made mechanically, or with a structural adhesive designed for it.
Will not bond at all: polyethylene, HDPE, polypropylene and other polyolefins. These have surface energy too low for the solvent to attack. No amount of surface prep changes this. Parts in these materials have to be joined by plastic welding, which melts the parent material with a hot gas gun and a filler rod of the same polymer. If you have a cracked HDPE tank or a polypropylene fitting to repair, cement is not an option.
Safety and the 2025 reformulation
Weld-On 3 and 16 were historically built on dichloromethane, and in some cases trichloroethylene. Both are hazardous substances with meaningful exposure controls in Australia. In 2025 the manufacturer reformulated its Weld-On range to remove DCM and TCE while keeping the same bond strength, clarity and cure characteristics, which the company documents in its reformulation announcement.
The reformulated products are safer, not safe. They remain volatile solvents. Work in a well-ventilated space or with extraction, keep them away from ignition sources, wear nitrile gloves and eye protection, and read the Safety Data Sheet for the batch you actually have. Safe Work Australia sets out the workplace obligations for hazardous chemicals if you are using these products commercially.
Store cans upright, sealed and out of direct sun. Solvent cement degrades once it has been open and repeatedly exposed to air, so decant what you need into an applicator rather than leaving the can open on the bench.
When to hand it over
Cementing acrylic well is a learnable skill, but it rewards volume and jigging. If you are building one display case, the guidance above will get you there. If you need twenty of them square, clear and repeatable, or the piece is large, load-bearing or has to hold water, it is usually cheaper to have it made properly. Our custom fabrication team has been assembling acrylic for Australian businesses since 1979, and we cut, bend, cement and polish in-house.
FAQ
What is the difference between Weld-On 3 and Weld-On 16?
Weld-On 3 is a water-thin capillary cement applied into a closed, well-fitting joint, and it leaves a near-invisible seam. Weld-On 16 is a thickened, medium-bodied cement in a tube that fills gaps, stays put on vertical joins and leaves a visible fillet. Use 3 when the edges mate cleanly and appearance matters, and 16 when they do not or the joint needs a bead.
How strong is a Weld-On joint?
On acrylic, a well-made capillary joint approaches the strength of the sheet itself, because the two parts fuse into one piece rather than being held together by a separate adhesive layer. Joint quality is the limiting factor: square, clean, unstressed edges with light clamping will outperform any amount of extra cement on a poorly fitted joint.
Can I use acrylic cement on polypropylene or HDPE?
No. Polypropylene, polyethylene and HDPE have surface energy too low for solvent cement to attack, so the cement simply sits on the surface and does nothing. These materials have to be plastic welded with a hot gas gun and a filler rod of matching polymer.
Why did my acrylic joint go cloudy?
That is blushing, caused by fast solvent evaporation chilling the surface and drawing atmospheric moisture into the joint. It is most common in humid weather. Working in a drier or warmer space and avoiding excess cement both reduce it. Fine crazing around the joint is a different problem, usually caused by cementing a flame-polished or internally stressed edge.
How long does Weld-On take to cure?
Weld-On 3 grabs in under a minute and is handleable within about fifteen. Weld-On 16 sets in five to six minutes and reaches roughly 80 per cent strength at 16 hours. Regardless of product, allow 24 to 48 hours before loading the joint, and the full 48 for anything holding liquid.