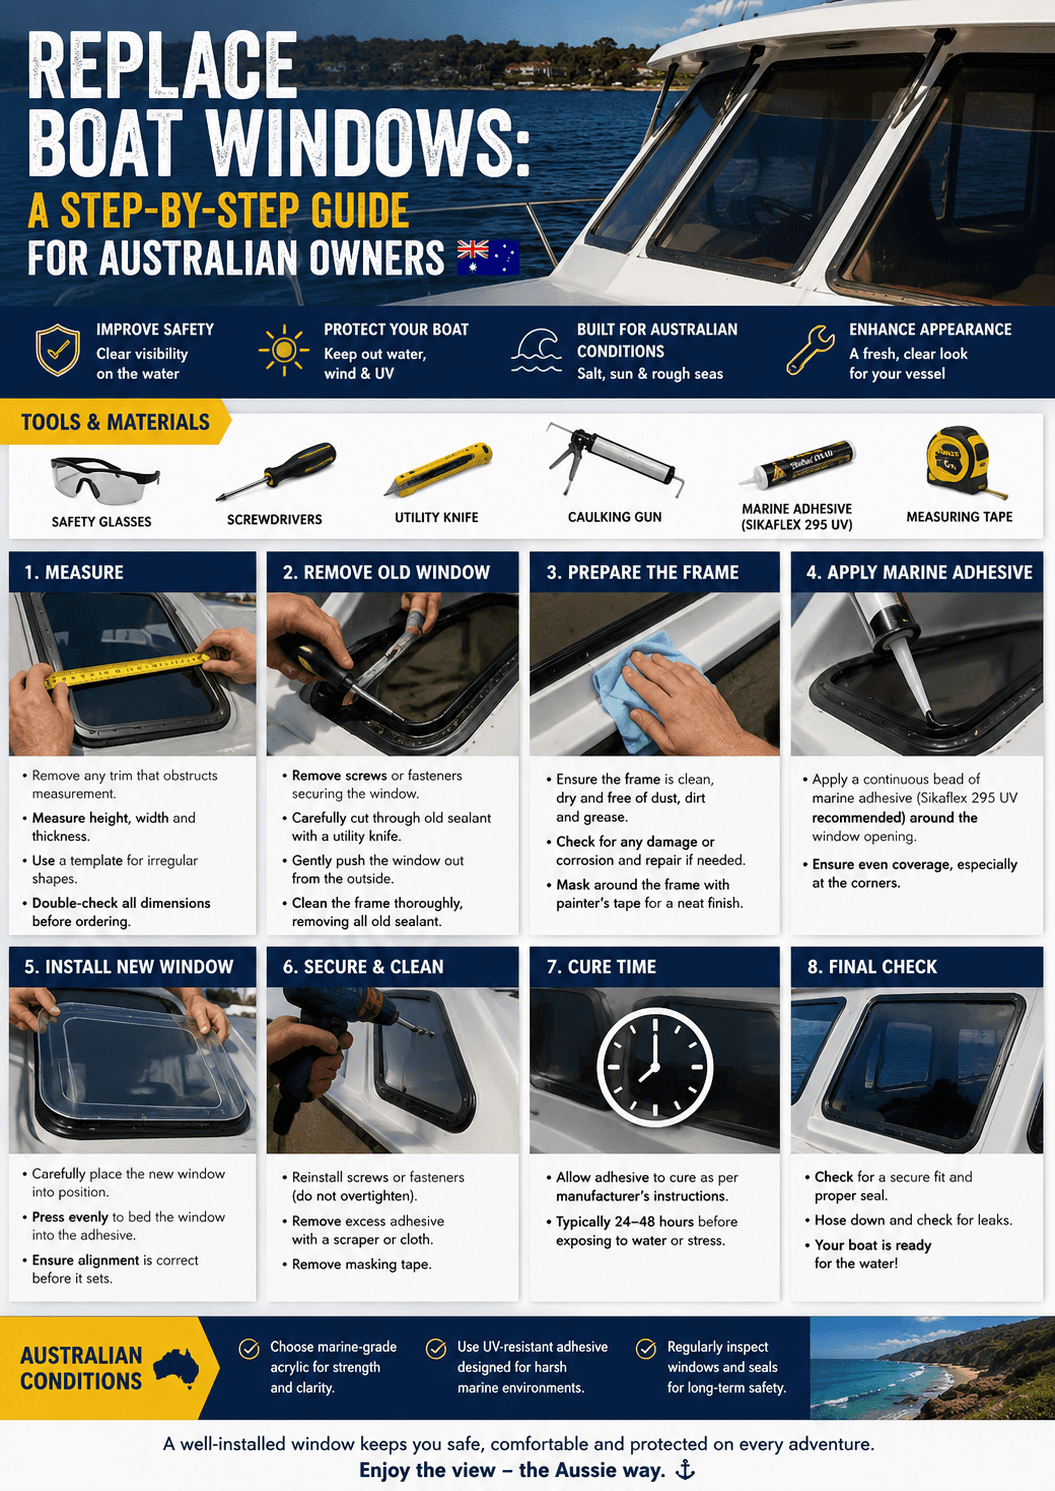
Australia’s harsh marine environment — intense UV, salt spray, and wide temperature swings — takes a serious toll on boat windows. Whether you’re dealing with crazing, yellowing, delamination, or cracked acrylic, replacing boat windows is a worthwhile DIY project that protects your vessel and restores visibility on the water. This guide walks you through the entire process, from assessment to final installation.
Why Boat Windows Fail (and Why It Matters)
Australian boat owners face some of the most demanding conditions in the world. The combination of strong UV radiation, salt air along the coast, and the mechanical stress of offshore swells means boat windows — particularly those made from older acrylic or polycarbonate — degrade faster than in many other climates.
Cloudy or yellowed windows aren’t just cosmetic issues. They reduce visibility, compromise safety, and can lower your vessel’s resale value. Cracked or poorly sealed windows also allow water ingress, which can lead to structural damage over time.
Addressing failing windows sooner rather than later is always the smarter — and cheaper — call.
What You’ll Need
Before you start, gather your materials and tools:
Materials:
- Replacement window panel (acrylic, polycarbonate, or marine-grade glass)
- Marine-grade sealant/adhesive (e.g. Sikaflex 291 or equivalent)
- Replacement gaskets or rubber trim (if applicable)
- Stainless steel or marine-grade fasteners
- Masking tape and solvent cleaner
Tools:
- Utility knife or oscillating multi-tool
- Screwdriver set and/or drill
- Caulking gun
- Heat gun (for stubborn old sealant)
- Measuring tape, pencil, and straight edge
- Sandpaper (fine grit for edge finishing)
Step 1: Measure and Assess the Existing Window
Start by carefully measuring the existing window opening — width, height, and depth of the frame rebate. Note whether the window is flush-mounted, frame-mounted with a surround, or held in place with a rubber gasket.
Take photos before you remove anything. These will be invaluable when reassembling.
If your current windows are a non-standard size or shape — curved, angled, or cut to a unique profile — you’ll almost certainly need custom fabrication. This is where sourcing the right supplier makes all the difference.
Step 2: Source Your Replacement Panels
For standard shapes, pre-cut panels from a plastics supplier may suffice. But for oddly shaped windows, portlights, or any situation requiring precision cuts, custom fabrication is the professional route.
Associated Plastics is a trusted Australian supplier offering custom-fabricated marine window panels in acrylic and polycarbonate. Their team can cut panels to your exact specifications, including curved and compound profiles, with clean, polished edges ready for installation. Ordering direct from an Australian fabricator means faster turnaround, precise sizing, and materials suited to local conditions — rather than importing panels that may not meet Australian marine standards.
When choosing your material:
- Acrylic (Perspex): Excellent optical clarity, good UV resistance, and easy to polish if scratched. The most popular choice for cabin windows and windscreens.
- Polycarbonate: Near-unbreakable impact resistance, ideal for exposed areas and forward windows subject to spray and wave impact. Slightly more prone to surface scratching.
- Marine safety glass: Used on larger vessels or where a fixed, rigid window is preferred. Heavier but highly durable.
Step 3: Remove the Old Window
With your replacement panel on order or in hand, it’s time to remove the old window.
- Remove any interior trim — unscrew or prise off any interior timber or plastic surrounds.
- Extract fasteners — remove all visible screws or bolts around the frame perimeter.
- Cut the sealant — use a sharp utility knife or oscillating tool to slice through the old marine sealant around the perimeter. A heat gun applied gently can soften stubborn adhesive.
- Push out the panel — apply gentle, even pressure from inside to push the old window out. Avoid prying, which can damage the frame.
- Clean the rebate — use solvent cleaner (acetone or equivalent) to remove all residual sealant and adhesive from the frame. This step is critical for a proper seal on the new window.
Step 4: Prepare the New Panel
Before installation, dry-fit the new panel to confirm it seats correctly in the rebate with even gaps on all sides.
If you need to drill fastener holes, use a sharp, slow-speed drill bit designed for plastics and apply minimal pressure to avoid cracking. Mark hole positions carefully using the old panel or frame as a template.
Apply masking tape around the perimeter of the panel on both sides to keep excess sealant off the surrounding surfaces during installation.
Step 5: Install and Seal
- Apply sealant to the frame rebate — lay a continuous, even bead of marine-grade sealant into the rebate or around the frame perimeter. Sikaflex 291 is widely used by Australian boat builders for its excellent adhesion, flexibility, and UV resistance.
- Set the panel — press the new window firmly into position, ensuring it seats evenly.
- Fasten if required — if the design calls for mechanical fasteners, insert and tighten screws gradually and evenly (like tightening wheel nuts on a car) to avoid stress cracking.
- Tool the sealant — use a wetted finger or sealant tool to smooth the exterior bead and create a neat, watertight finish.
- Remove masking tape — peel away tape while the sealant is still wet for a clean line.
Allow the sealant to cure fully (typically 24–48 hours) before exposing the window to water or flexing.
Step 6: Final Check
Once cured, inspect the seal from both inside and outside. Run water over the window with a hose to check for any ingress. Check that there’s no rattling or flexing, which could indicate an insufficiently bedded panel.
Getting the Best Results
The quality of your replacement window starts with the quality of your panel. Poorly cut or incorrectly sized panels lead to uneven stress, premature cracking, and seal failure. For Australian boat owners who want the job done right the first time, Associated Plastics offers a professional custom fabrication service specifically tailored to marine applications — with the precision cutting, edge finishing, and material options your vessel deserves.
Whether you’re refitting a tinnie, a cruiser, or a commercial vessel, the right panel from the right supplier makes every step of this process significantly easier.